| |
 |
|
 |
|
 |
 |
 |
 |
 |
 |
 |
Peas,
Runner Beans,
Broad Beans,
Dwarf Beans,
French Beans,
Climbing Beans |
Asparagus,
Aubergine,
Broccoli,
Brussels,
Cabbage,
Cauliflower,
Courgette,
Leek,
Marrow,
Pumpkin,
Sweetcorn,
Spinach,
Tomato
|
Beetroot,
Carrot,
Parsnip,
Celeriac,
Swede,
Turnip
| Celery,
Cress,
Cucumber,
Lettuce,
Peppers,
Radish,
Rocket,
Salad Leaves |
Onion & Shallot Sets,
Onion & Shallot Seeds,
Garlic |
First Earlies,
Second Earlies,
Maincrop,
Organic
|
Basil,
Coriander,
Dill,
Fennel,
Mint,
Rosemary,
Tarragon,
Thyme,
Sage |
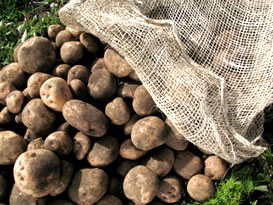
Growing Potatoes on the Patio?
Potatoes on the patio
There is nothing better than a plate of freshly cooked potatoes, smothered in butter and fresh mint. However, supermarket varieties can prove flavourless, and are sometimes past their best by the time you come to eat them. Many people don�t know exactly how easy it is to grow your own � you don�t need a field or specialist equipment! Our guide to growing on the patio will help you to sow and raise your own mini-crop � even if you have only a small space to spare.
Which variety?
With a little forward planning, it is possible to ensure a fresh supply all year round. Maincrop potatoes will provide tubers which can be stored over the winter months. Earlies, on the other hand, will produce new potatoes during the summer months. If you plant both
early and
maincrop varieties, you can be assured of tasty veg all year round. Still unsure which type is for you? Try our taster selection,
the trial pack allows you to buy a small quantity of each variety, to see if they are right for you.
|
 |
Starting from scratch
To get underway, you�ll need to buy your chosen variety as a seed� basically a small potato from which the plant will grow. Give your crop a head start by chitting them before planting in the soil � this means allowing them to sprout from the eyes for a few weeks before they go outside.
To help the process along, rub off all but four of the new sprouts as they emerge. This will ensure that the seed diverts its energy into producing a few very strong shoots rather than a number of weaker ones.
After approximately six weeks, you will be ready to move them to their final position. Choose a warm, sunny spot in the garden avoiding potential frost pockets. Although they can be grown in almost any soil, the most successful harvest will be obtained from a well-manured and fertilized medium.
Dig a �v� shaped trench, approximately five inches deep and plant your chitted potatoes with the shoots facing upwards. The seeds should be covering of at least three inches, but be careful not to damage the shoots as they snap off very easily. Your
earlies should go into the ground in late March, and
maincrop in mid to late April. If newly emerging shoots are threatened by late frosts, draw up more soil to keep them protected. When your plants are between eight and ten inches tall, you are ready to begin �earthing up�- draw soil from either side of the row to cover the base of the plant to a height of six inches. This added depth encourages more roots to form.
Early Varieties will be ready for the table in just twelve weeks after planting, whilst
maincrop will be ready for storage in mid Autumn.
|
|
An easy alternative
For a less labour intensive way of growing potatoes, try our Victoria style barrel. Finished with a frost-proof terracotta effect, this is a practical as well as decorative solution. The barrel holds up to eighty litres of compost, and up to five individual plants. Simply add compost as the potatoes grow, and harvest a few at a time through the easy access door at the bottom of the container. You can also start your crop indoors, to get ahead of the growing season.
|
|
|
| |
|
|
|
|